Posts

Showing posts from 2016

Implement Click Listener on RecyclerView
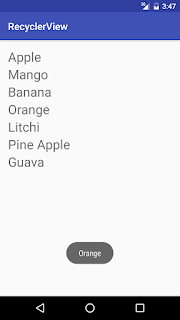
Image
In this post Implement click listener on RecyclerView I put the code after the RecyclerView setAdapter for click listener on RecyclerView following :- final GestureDetector mGestureDetector = new GestureDetector(MainActivity.this, new GestureDetector.SimpleOnGestureListener() { @Override public boolean onSingleTapUp(MotionEvent e) { return true; } }); recyclerView.addOnItemTouchListener(new RecyclerView.OnItemTouchListener() { @Override public boolean onInterceptTouchEvent(RecyclerView rv, MotionEvent e) { View child = recyclerView.findChildViewUnder(e.getX(), e.getY()); if (child != null && mGestureDetector.onTouchEvent(e)) { int a=recyclerView.getChildPosition(child); Toast. makeText (MainActivity.this, fruit[a], Toast. LENGTH_SHORT ).show(); } return true; } @Override public void onTouchEvent(RecyclerView rv, MotionEvent e) { } @Override public v...
Implement RecyclerVIew in Android

Image
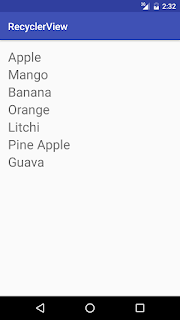
First you can create new project in Android Studio. In this you can create one more xml file and java file. Because RecyclerView  Accept only RecyclerView adapter that why we create another file for REcyclerView Apter class.   After that open the build,gradle(Module:app) and add the following Dependency:-               compile ' com.android.support:recyclerview-v7:24.2.1' After that add the RecyclerView Tag into avtivity_main.xml file between the Layout Tag likew that :-              <android.support.v7.widget.RecyclerView android :id= "@+id/recyclerView" android :layout_width= "match_parent" android :layout_height= "match_parent" /> Open the MainActivity file and declare the RecuclerView and assign the Id to the variable. Now i show you the code in MainActivity.class file  following :- public class MainActivity extends AppCompatActivity { //Decl...

Implement ListView in Android

Image
Hello Friends now we create List View in Android. First we create a new xml file or we can create the same xml file.   In this xml file List view tag is used and ensure that id is also provide it. After that now we move to main file. Now in this we use ArrayAdapter to store the data in array format. After that we set the Adapter by the ArrayAdapter objet. Like in the given above Pic. shown to you.  If image are not shown clearly then click on it Please. Hope you understand the my code.

How to open App Via Notification in Android and Implement PendingIntent

Image
Hello friends Now we Open App via Notification. Very Simple this is only Three Line of code to Open App Via Notification in Android and the code is Following:- This code is apply in between the notification code which is show to you in my previous post. And now i see you again the code following  And At the end above the break keyword nM.notify(0,nB.build()); is used. After that your App is open when you click on the Notification.  I hope you will Understand it.

How to Implementation Notification in Android

Image
Hello friends Now we learn How to Implement Notification in Android. In this post all the code Shown in the bottom Image is Placed when You want the Notification Appear in the Status Bar. Output of Above code is following:- After Click on the Notification Button then following Output is came. Now you are able to create Notification in Android App.

Alert Dialog Box in Android

Image
HELLO friends now we create a Alert Dialog Box in Android. Alert Dialog Box is like a Popup window that confirm the user can do it or not.  The code is placed in MainActivity.java file and create a onBackPressed() fun. and put into it.   In this finish() function is used to close that Activity in which you apply that function. Now you are able to create Your Own Alert Dialog Box in Android App.

Move one Activity to Another Activity in Android

Image
In this post we learn How to move one Activity to Another Activity. Firstly you create two different Activities like I am create two Activities MainActivity and Second two file are created. After that You also enter the second file name into the MainFest.xml file for enter the name of second file name .      This prevent your app for crash.   Now we enter the code for move one activity to another   The main code is Intend class to move one activity to another activity. example: Intent in=new Intent(getBaseContext(), yourSecond Class name.class); startActivity(in); This code is implement on the main Activity.like I am used it to MainActivity.java file.

How to Remove error in java when loading

Image
Firstly open the advance system setting. Right click on MyComputer->click proerties->click advance system setting new popup window is open. Then click Environment variables. Then go to the system variables scroll down and click to the path and click edit button. Then paste the address of the path where the java execute file is locate in the c:\ drive. Now you follow the pic instruction to solve error.     Copy the address of the address bar.     In the last part copy the address which is copied by you in first pic. Then exit the command prompt and reopened it and run the file again. 

Hello World in Java

Image
This is the first program to learn Java language. You know that Java is purely OOPS base language. That means in Java Language all work in the classes. en To copy the code and paste it to your Notepad and save the file with the class name which contain the main method.           For Example:- In my class demo public static void main method is the main method to of my class demo.   Now I explain the program Firstly we create a class with class name. For creating a class we use class keyword. make sure the class keyword is small letters then provide a class name according to you. After that in the class we create a main method. In Java we create a main method like that in the above pic public static void main(String args[]) {} In this main method work similarly main method work in C++. And to show the output on the console we write System.out.println(); This System.out.println() command is similar cout in the C++ . We write any thing...

How to download and install Java in Ubuntu and other Linux version

Image
Firstly open the TERMINAL from your Linux OS. After that put the following command like that      This command is put your terminal:-                          $ sudo add-apt-repository ppa:webupd8team/java After that update that file like that   This command is put your terminal:-                         $ sudo apt-get update Now to install the Java by following commands:-    This command is put your terminal:-                        $ sudo apt-get install oracle-java8-installer This command help you to install the Java in your computer. To check Java is install or not to check the version of the Java by following command.     This command is put your terminal:- ...

Now we learn how to execute java file in Ubuntu and any Linux OS

Image
Firstly open the TERMINAL. Then go to the folder which contain the Java file. With cd command This command enter you into the Desktop . After that we go in the folder which is situated on the Desktop. like on my Desktop Java folder is created.   After that we compile the Java file with javac command. After the compilation new file is automatically created in same folder with .class extension.  In my Java folder I created Java file with name demo.java extension.    Now we execute the Java file with java command like that and make shore the name of class write whose contain the main method. That name is put which .class extension is used.   And now you can run the Java file in ubuntu and same Procedure is follow to run Java file in any Linux OS

AddThis